
Cookies From Nature
‘Tis the season to be thankful for friends, family, and citizen science. And you can combine all three by making Notes from Nature cookies to serve to those around you:
| Ingredients | Preparation |
|---|---|
| 2 3/4 cups all-purpose white flour 1 1/4 cups granulated sugar 1 teaspoon baking powder 1/4 teaspoon table salt 2 large egg yolks 3/8 cup sour cream 1 tablespoon vanilla 1 1/2 sticks (12 tablespoons/175 g) unsalted butter |
1. Melt the butter and set aside to cool slightly.
2. In a large bowl, combine dry ingredients and whisk together. 3. In a smaller bowl, whisk egg yolks, sour cream, and vanilla until combined. Slowly add melted butter, whisking constantly, until mixture is smooth and homogeneous. 4. Pour wet ingredient mixture into dry ingredients; mix until flour is completely incorporated and the dough roughly makes a ball. 5. Turn dough out onto sheet of parchment paper (lightly floured if necessary), and separate into two halves. Form each half into a book-shaped rectangle and wrap with cling film. |

This is one half of the dough. This recipe makes a lot of cookies.
Once this is done, put the dough in the fridge for an hour or so to chill it out somewhat. You want the butter in the dough cold enough to keep its shape and not stick to things, but warm enough that the dough doesn’t break when you roll it out. Once you’re there, knead the dough a bit to get rid of any cracks and form a ball shape, then roll it out on a piece of parchment paper. In my experience the dough doesn’t stick to the paper or the rolling pin, but you can use a bit of flour here if necessary to prevent sticking.
Just before you start rolling, preheat the oven to 325F (160C). Roll the dough out to about 1/8-inch (~3 mm) thickness. Then start cutting out shapes. If you have cookie cutters for leaves, butterflies, and other Notes from Nature objects, great! I didn’t, though, so I free-handed them instead, with the help of a friend.
This is a pretty standard recipe for butter cookies, and was adapted from Cook’s Country. The key point here is that you can knead it, roll it out, cut out shapes, collect scraps, knead them, roll them out, etc… for as long as you like, and the dough won’t get tough. So go ahead — get creative with the shapes!

If you’re doing this freehand, it might take a few tries to get a decent moth shape. Unless you’re my assistant/friend, who was awesome from the start.
Bake until the edges of the cookies are golden brown. The timing depends on the size of the cookies and whether or not you have a convection/fan oven. The original recipe was for a conventional oven and recommended 16 minutes per cookie, which will need to be shortened considerably if you have small cookies and a fan oven. Might be best to set a timer for 7 minutes and then rotate the cookie sheets and check for doneness.

Of course, when you bake cookies of wildly different sizes on the same sheet, it’s not easy to get them all to “golden brown” at once.
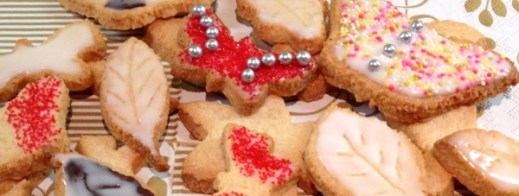
To decorate, you can make a simple icing with 1/2 cup of icing sugar and 1 tablespoon of milk (plain icing) or lemon juice (sweet-tart icing). You can also use food coloring or a drop or two of flavor extracts like almond or mint. The icing can be the decoration by itself, or it can be used as an underlaying glue for various sprinkles and edible beads, or it can be layered over melted (then chilled to set) chocolate. The sky is the limit for decorating, or you can just leave these plain, as the cookies are delicious on their own. But a little sparkle can be fun too:

I brought these into work the next day, where my Zooniverse colleagues were happy to help me taste test.
Which one is your favorite shape? What would you add? There’d be plenty of room for it: the above picture shows about one-quarter of the cookies this recipe made. You won’t be lacking for cookies. Enjoy!

Zooniverse team member Grant Miller prefers the colorful butterfly!
